Why Are My Biscuits Doing That? A No-Panic Guide to Fixing Every Baking Fail
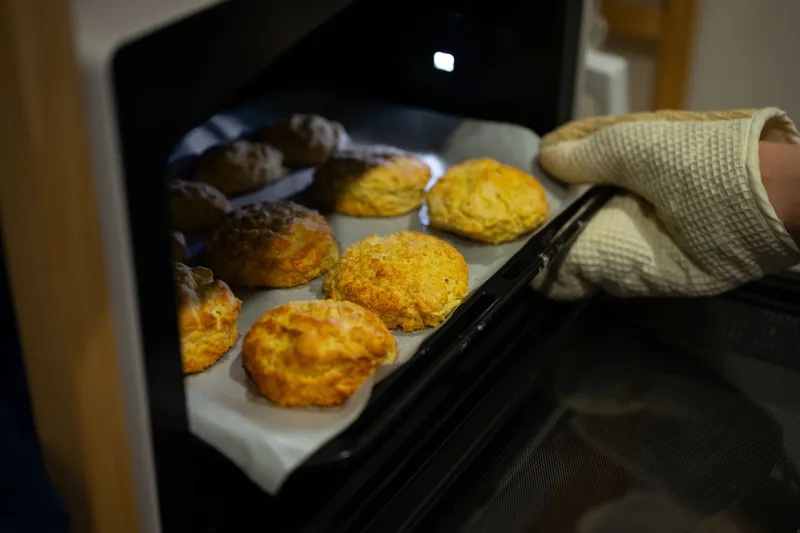
You followed the recipe. You were careful. You even chilled your butter like everyone said to. And yet — your biscuits came out flat as hockey pucks, or dense as a paperweight, or so greasy on the bottom that the paper towel couldn't keep up. What happened?
First: take a breath. Biscuit baking has a learning curve, and every frustrating batch is actually just data. Once you know what each problem is trying to tell you, fixing it is way more straightforward than you'd think. This is your no-panic, no-judgment troubleshooting guide — and we're going through every common biscuit disaster one by one.
Problem #1: My Biscuits Are Flat and Dense
This is probably the most common complaint, and it almost always comes down to one of three culprits.
Your leavening is old or inactive. Baking powder loses its punch over time. If yours has been sitting in the pantry for more than 6 months, it may not be doing much of anything. Test it: drop a teaspoon into a cup of hot water. If it bubbles aggressively, you're good. If it just sort of... sits there, toss it and buy a fresh container. This single swap fixes a shocking number of flat biscuit problems.
You overworked the dough. This one stings because it feels like you're doing the right thing by being thorough. But biscuit dough is not bread dough — it doesn't want to be kneaded. The more you work it, the more gluten develops, and the result is a tough, dense biscuit instead of a tender, fluffy one. Mix just until the dough holds together, even if it looks a little shaggy. That's exactly where you want it.
Your butter wasn't cold enough. Biscuit lift comes from steam — specifically, the steam that bursts from cold fat pockets when they hit a hot oven. If your butter was too soft going in, it melted into the dough before it had a chance to create those pockets. Keep your butter in the freezer and grate it directly into the flour, or cut it in quickly and pop the whole bowl in the fridge for 10 minutes before adding your liquid.
Problem #2: Greasy Bottoms and Soggy Undersides
A greasy biscuit bottom usually means one of two things: too much fat in the recipe, or a pan that wasn't set up correctly.
Check your fat ratio. If you're experimenting with a recipe and bumped up the butter for richness, dial it back. Biscuit dough has a fairly precise fat-to-flour ratio, and going over it means the excess fat has nowhere to go except pooling at the bottom during baking.
Your baking surface matters more than you think. Dark metal pans absorb heat faster and can cause bottoms to cook too quickly, sometimes leaving a greasy residue before the rest of the biscuit sets. Try switching to a light-colored baking sheet, a cast iron skillet, or a parchment-lined pan. Parchment is especially helpful — it creates just enough of a barrier to keep things from getting soggy while still letting the bottom brown properly.
Oven temperature could be the issue. A too-low oven lets fat melt slowly rather than creating steam quickly. Make sure your oven is fully preheated to 425°F before the biscuits go in, and consider using an inexpensive oven thermometer to verify your oven's actual temperature — many home ovens run 25–50 degrees cooler than the dial says.
Problem #3: My Biscuit Edges Are Spreading and Losing Their Shape
You cut them beautifully. You placed them on the pan with care. And then they spread into sad little puddles. Here's what's going on.
Warm dough is the main offender. If your kitchen is warm, your hands are warm, or you spent a lot of time handling the dough, the butter starts softening before the biscuits even hit the oven. The fix is simple: after you cut your biscuits, put the whole pan in the freezer for 10–15 minutes before baking. Cold biscuits going into a hot oven is the formula for maximum rise and shape retention.
Your cutting technique might be working against you. This surprises a lot of people — if you twist your biscuit cutter as you press down, you're sealing the edges of the dough, which prevents the layers from opening up and rising properly. Press straight down and lift straight up. No twisting, ever.
Try baking them touching. Placing biscuits so their sides are just barely touching on the pan gives them something to push against as they rise, helping them go up instead of out. This is especially useful if spreading has been a consistent issue.
Problem #4: Dry, Crumbly Biscuits That Fall Apart
A biscuit that crumbles when you pick it up is a sad thing, but it's a fixable one.
Not enough liquid. Biscuit dough should be slightly sticky and feel a little wetter than you think is right. If your dough was dry and stiff before baking, it'll be dry and crumbly after. Add your liquid gradually, but don't be afraid to use all of it — and if the dough still looks dry, add another splash of buttermilk one tablespoon at a time.
Overbaking. Even a few extra minutes in the oven can pull moisture from a biscuit and leave it dry. Start checking at the low end of your recipe's time range. The tops should be golden, and when you tap the bottom, it should sound slightly hollow. Pull them out at that point — they'll continue cooking for another minute or two from residual heat.
Too much flour. If you're scooping flour directly from the bag with your measuring cup, you're almost certainly using more than the recipe intends. The proper method is to spoon flour into the measuring cup and level it off with a straight edge. Better yet, use a kitchen scale. Even a couple of extra tablespoons of flour can dry a biscuit out significantly.
Problem #5: Biscuits That Don't Brown on Top
Pale, wan biscuits that look underdone even when the inside is cooked through — this is usually a quick fix.
Add an egg wash or buttermilk brush. Right before baking, brush the tops of your biscuits with a little buttermilk, heavy cream, or a beaten egg mixed with a splash of water. This gives the surface something to caramelize and brown up beautifully.
Use the top third of your oven. Heat rises, and biscuits placed in the upper portion of the oven will brown on top more readily than those on a middle or lower rack. If you've been baking on the center rack and getting pale tops, move things up a notch.
The Bigger Picture: Trust Your Instincts
Biscuit baking is part science, part intuition — and the intuition part develops with practice. Every batch teaches you something, even the disasters. Especially the disasters, honestly.
Here at Little Biscuits, we truly believe that the path to your best biscuit ever is paved with a few flat ones, a greasy bottom or two, and at least one batch that made you laugh at how wrong it went. That's not failure — that's baking.
So the next time something goes sideways, come back to this guide, figure out what happened, and try again. Your perfect, golden, tall, flaky biscuit is closer than you think.